David Light has a great rundown of the new features over at his blog. There are some flashier improvements such as the ability to add ambient occlusion to a hidden line view (nice!) and some obvious, but long awaited improvements.
Tagging has been extended to allow you to Tag Rooms in linked
Architectural and MEP files. Spaces can be tagged in linked MEP files.
Keynoting tags now work across all linked file types whether they are
Architectural, MEP or Structural files. Area tagging now works on
linked Architectural and MEP models. The ability to Tag Rooms alone is
worth its weight in gold…
I’d have to agree that tagging rooms through linked models is worth the price of admission by itself, but I am also very excited about the UI improvements and the notion of assemblies. The example image David shows is of floors and walls that have multiple, independently identifiable and controllable layers. This has some really interesting implications and I’m curious to get my hands on it and see what can be done.
I’ve been back from my first AU for a little over a week now, but I haven’t been able to sit myself down at a computer and reflect on that experience. I met so many wonderful people and saw some pretty amazing work - it was truly an inspiring conference. Thanks to everyone who put it together and participated. This, however, is not the post to recap the conference - it’s just a little teaser and perhaps a bit of a plug. While sitting in the gigantic stadium where the keynote was held, I heard the beginnings of a quite compelling talk by a young woman describing how horribly her first project failed, but how much she and her partner learned from it. It sounded like school and was a good choice, I thought, for how to start the keynote. I also thought the project reminded me of something one of my former classmates would be involved with. Well, as I continued to listen to Emily describe her next couple of projects and introduce who her partner was, I realized it was the very same Matt Miller I knew from grad school. Surprise! If you have a chance, take a look at their website and spend a few minutes taking in what they are doing - it’s really good stuff.

In the spirit of being more than “just another Revit blog,” I’m going to pepper this with some tips that I’ve found useful. I’ll try to keep things relevant and generally on the topics of automation and productivity.
Today I rediscovered a neat little Windows command called xcopy. You may know it, but if you don’t you can open up a command prompt and type help xcopy and you will be presented with a list of options.
XCOPY is a command line utility that, among other things, allows one to copy a folder structure without copying the files in the folders. This can be helpful if you want to study some changes to the structure of your project directory template or your office library. It can also be useful if you have set up a great folder structure that you want to reuse somewhere else.
The syntax I use for copying a directory tree without copying any of the files is shown below.
xcopy C:\MySourceDirectory "C:\New Directory with Spaces" /T /E
The /T switch will copy the directory structure without copying the files and the/E switch will tell it to include empty directories. If your source or destination path has spaces be sure to enclose it in quotes. There are other things you can specify, but this is what I have found useful. The best part is that it’s a command line utility so you can include it in a script. You can find out more information about XCOPY by searching Google or Wikipedia.
Here’s a fun little command from the AutoCAD days… LineworkShrinkwrap or _aeclineworkshrinkwrap if you prefer. We use AutoCAD ADT 2008 at our office, but I think this command goes back a long way (and probably will go forward forever if I know Autodesk). What it does, as you might infer from the name of the command, is create a closed Polyline around the things you have selected. You may not have an immediate need for it, but I can assure you, once you know it’s possible you will find an application.
I don’t actually know where the AEC commands are documented (if you know, please post it in the comments), but I have found scant references to it in the forums and in the Civil 3D online help. There are other gems hidden in there too such as AECTOACAD for those times when you need some help cleaning up a dwg.
Here’s a bonus tip - if you can’t quite remember the name of a command in AutoCAD, start typing it on the command line and then hit TAB. You will be scrolled through all possible commands that begin with what you typed… a good way to jog your memory or just see what’s available. Also very telling about the origins of the software.
Just a quick tip here that I always forget about and somehow ends up frustrating me for 15 minutes until I realize what’s going on.
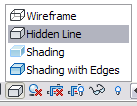
Here’s what happens: I am attempting to place a spot elevation in a plan view and find that I can only select an edge or endpoint; if I try to select an open area on a floor I get the universal “NO” symbol (i.e. the circle with a slash through it). My next 10-15 minutes are spent checking the associated level, the view range, various properties, the floor object, etc. Then I notice that the view is set to Wireframe.
The moral of the story - if you want to use spot elevations, your view’s Model Graphics Style must be set to Hidden Line. I suppose there’s some logic to this, but it’s not entirely clear.
UPDATE: Okay, a quick web search informs me that I’m not the first person to run across this issue and blog about it.